DNS Healthchecks
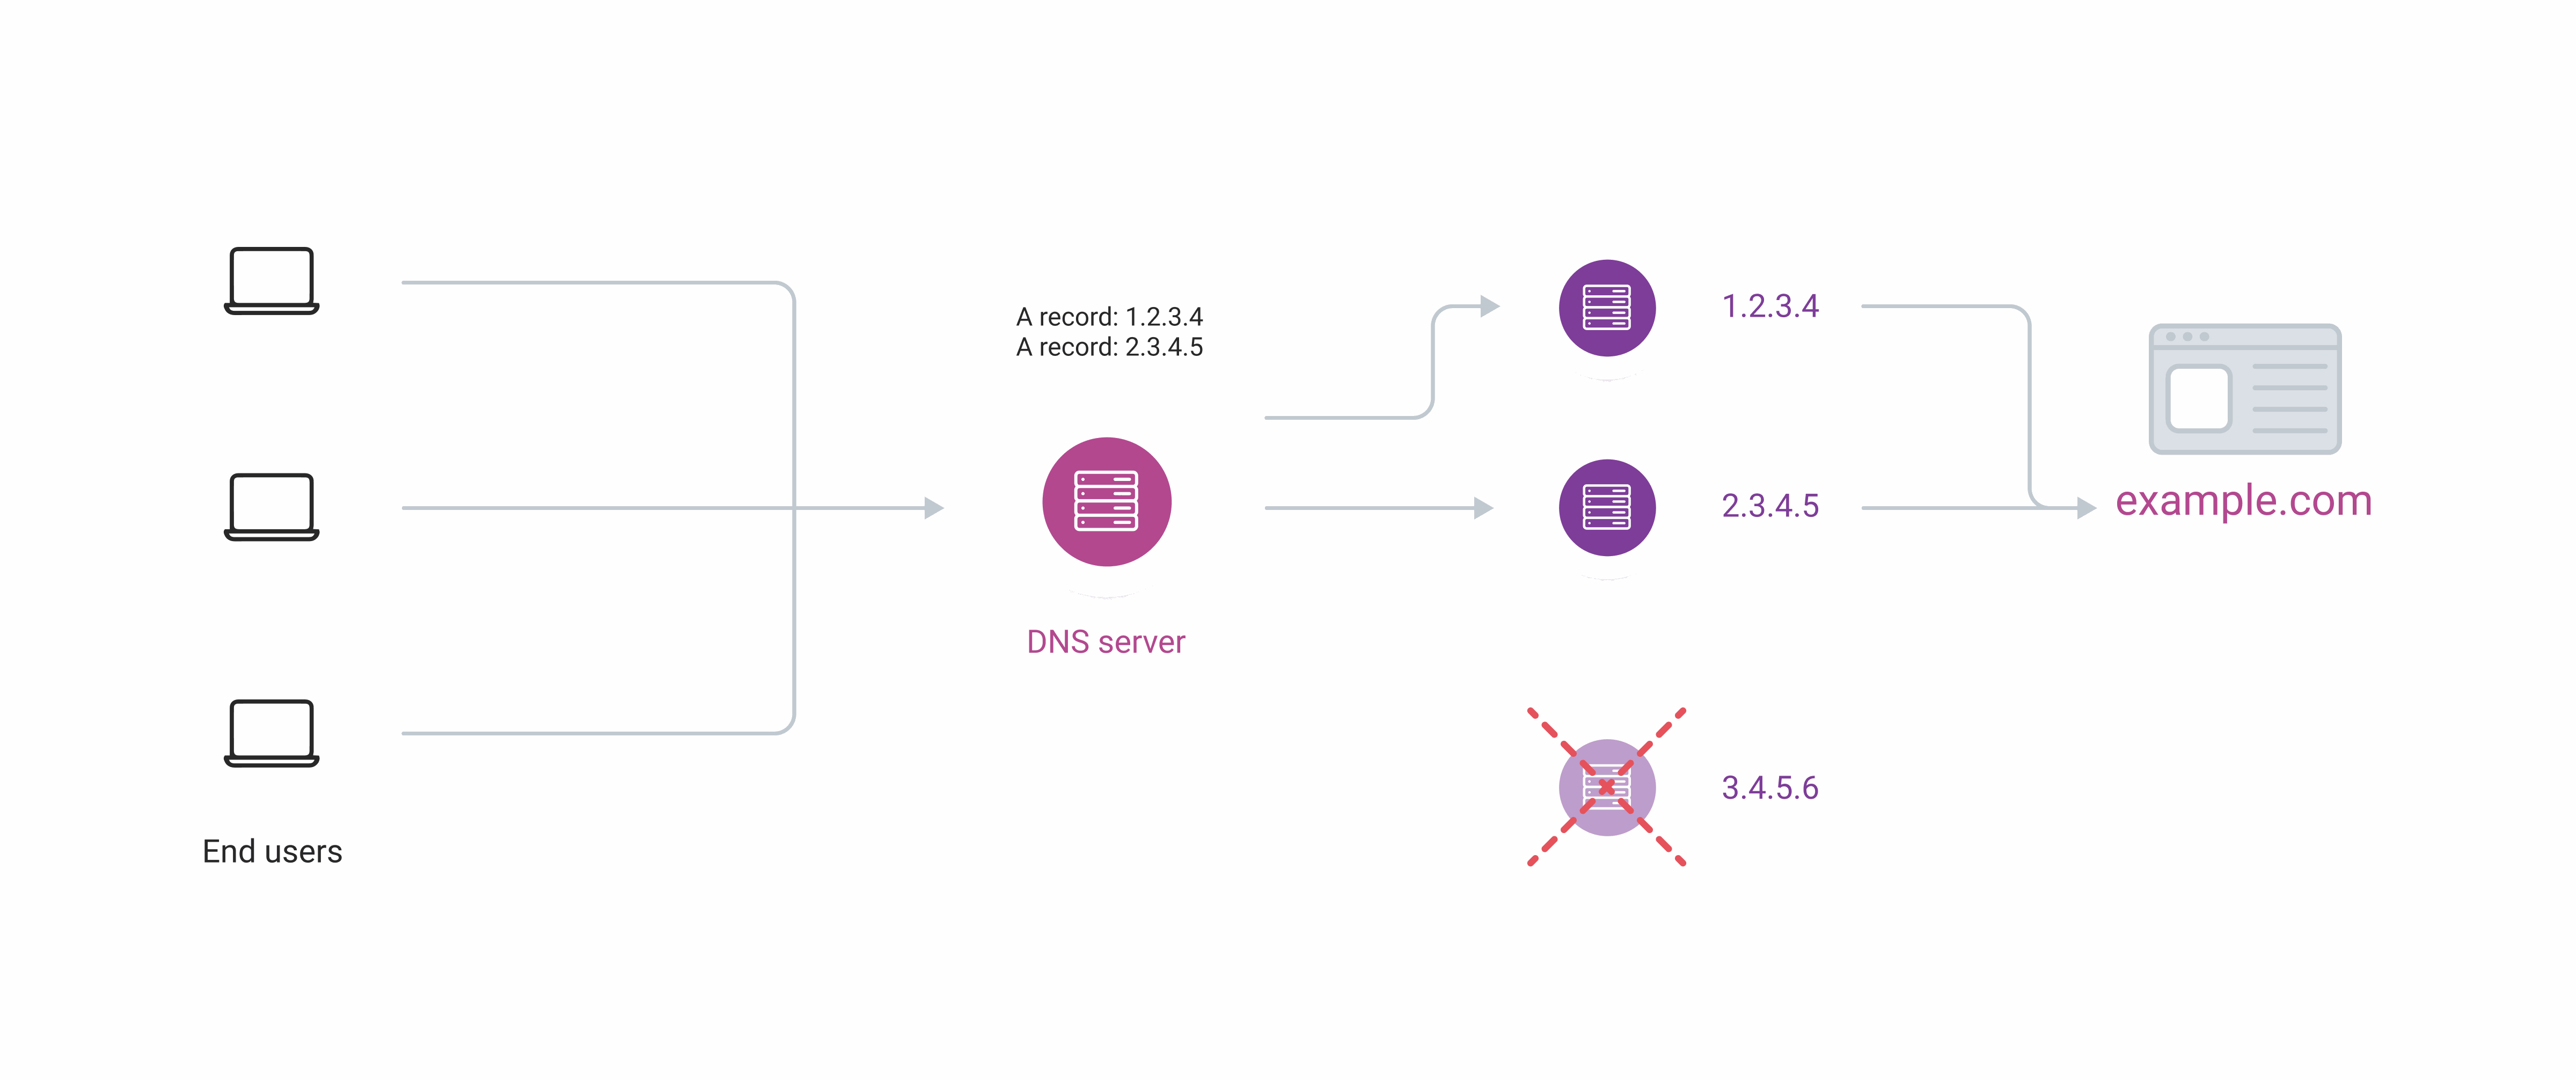
Healthchecks keep a site or application available when one or more servers go down. This feature monitors server availability and excludes non-working IPs from DNS responses when issues occur. As a result, traffic is redirected from the problematic server to a working one, and the resource stays available for all users.
Healthchecks mechanism
Healthchecks operate in a continuous poll-detect-respond cycle. The brief overview below covers the essentials; the step-by-step breakdown that follows explains each stage in detail.
Basic explanation:
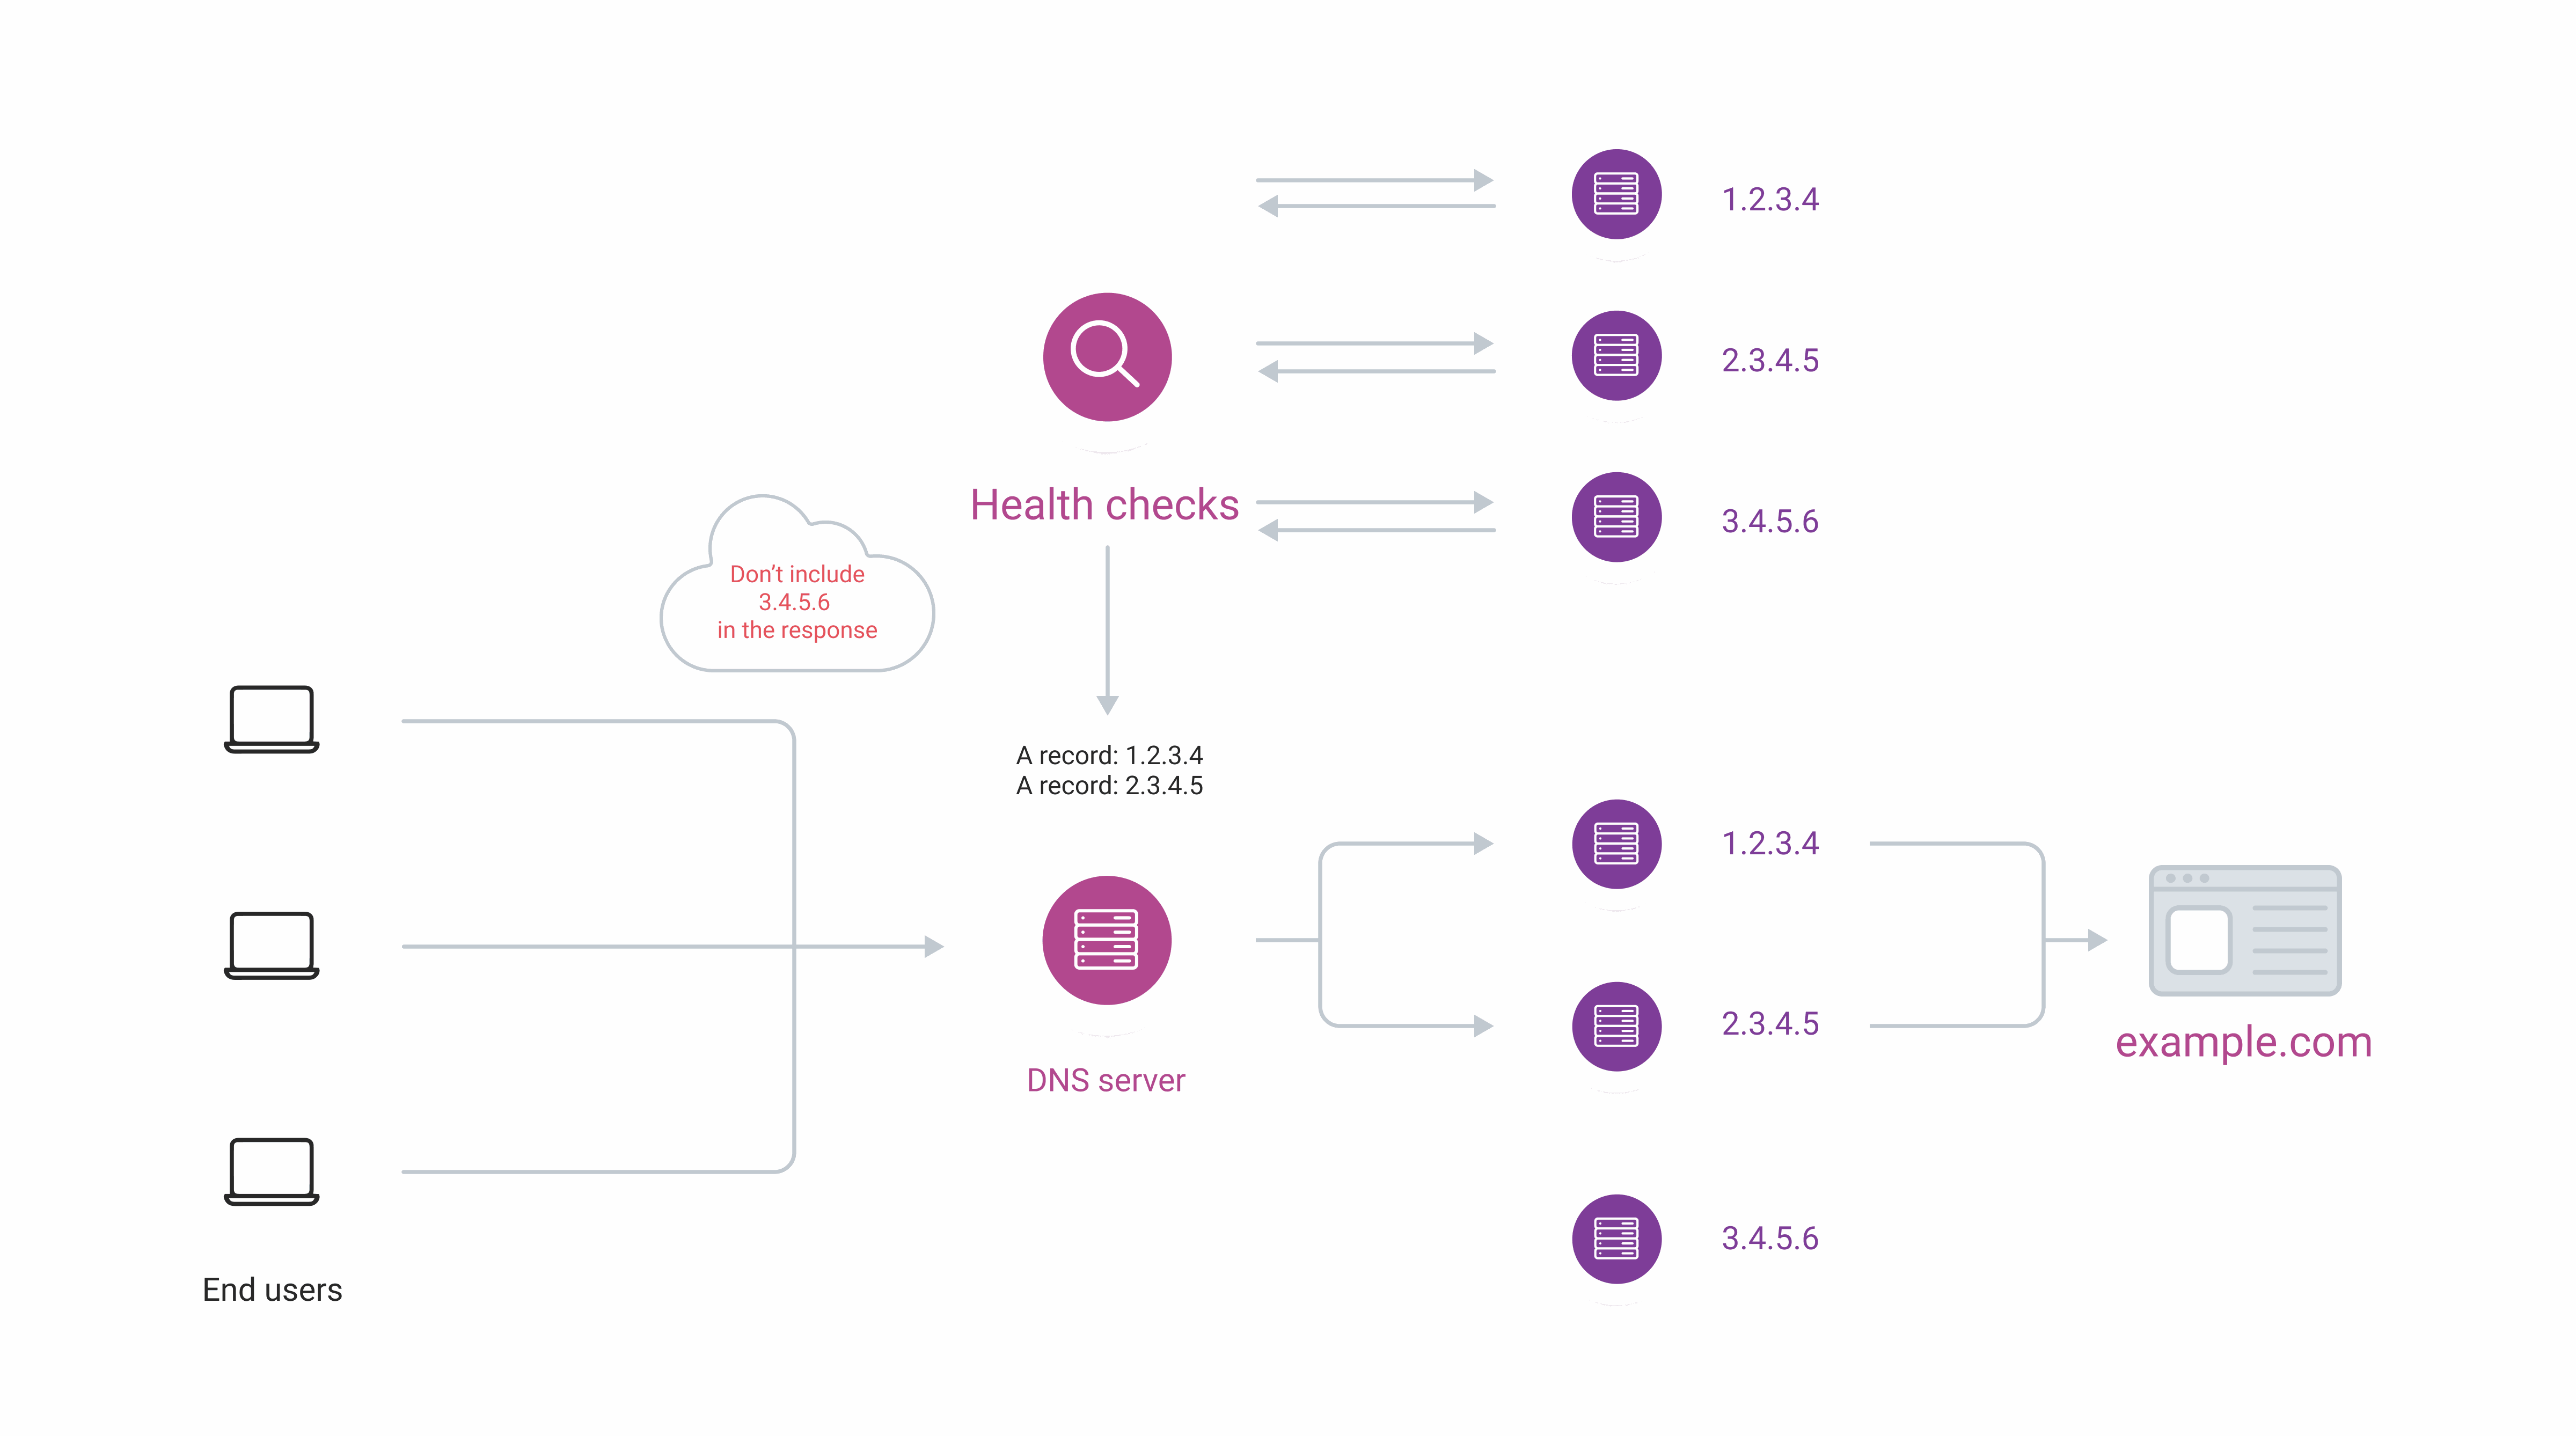
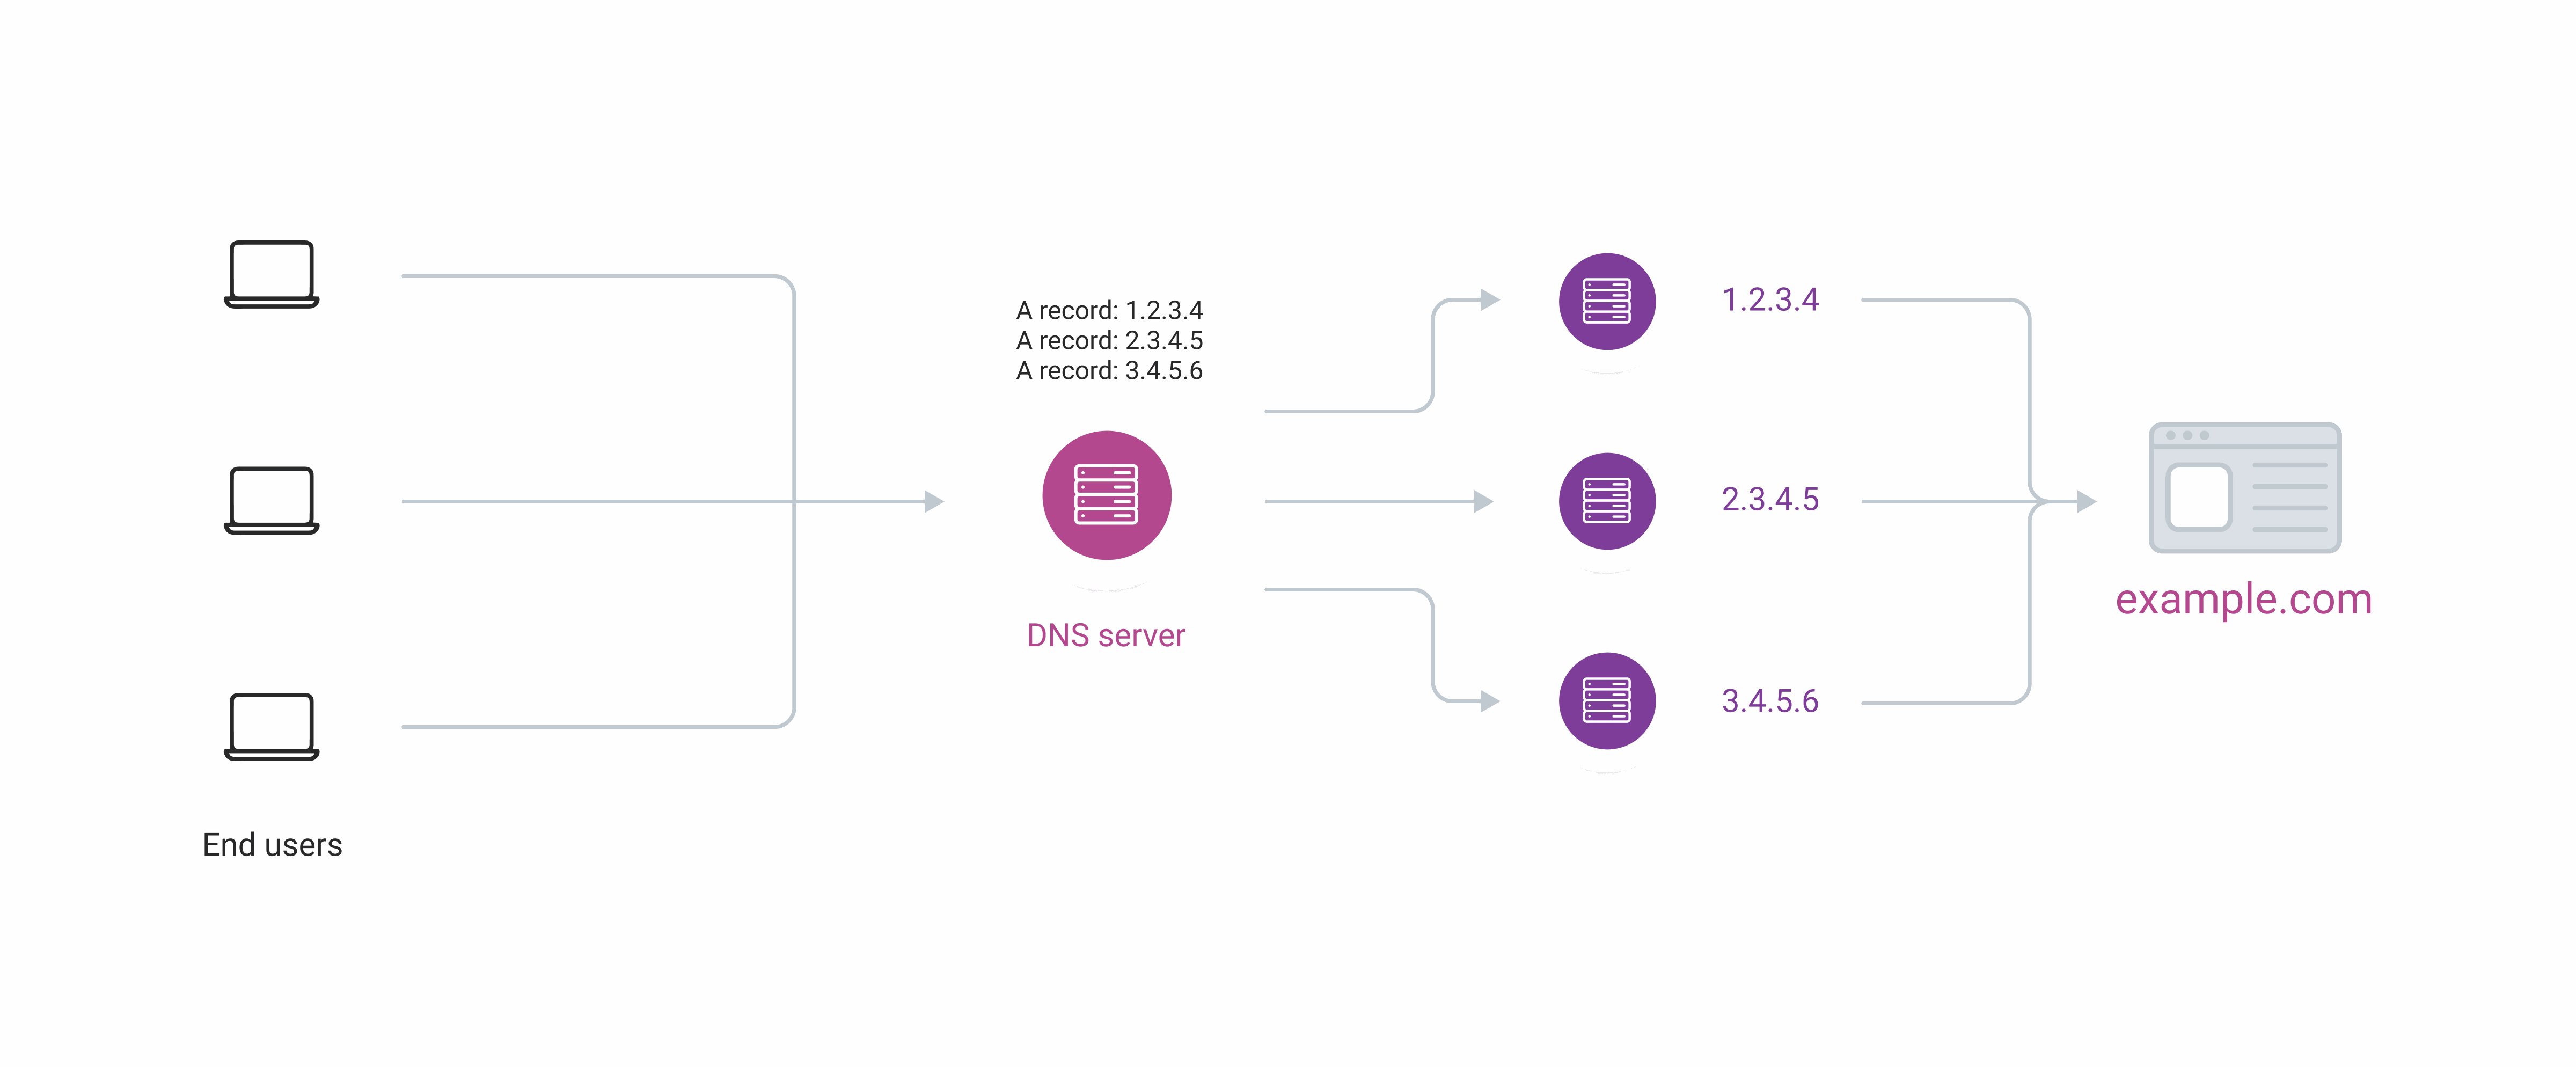
DNS Healthchecks sends regular requests to each configured record to determine whether the server is reachable. A record is excluded from DNS responses when its server stops responding, and restored when it comes back online. By default, round-robin balancing distributes requests across available servers; Geobalancing can also be enabled.
Detailed explanation:
- 1
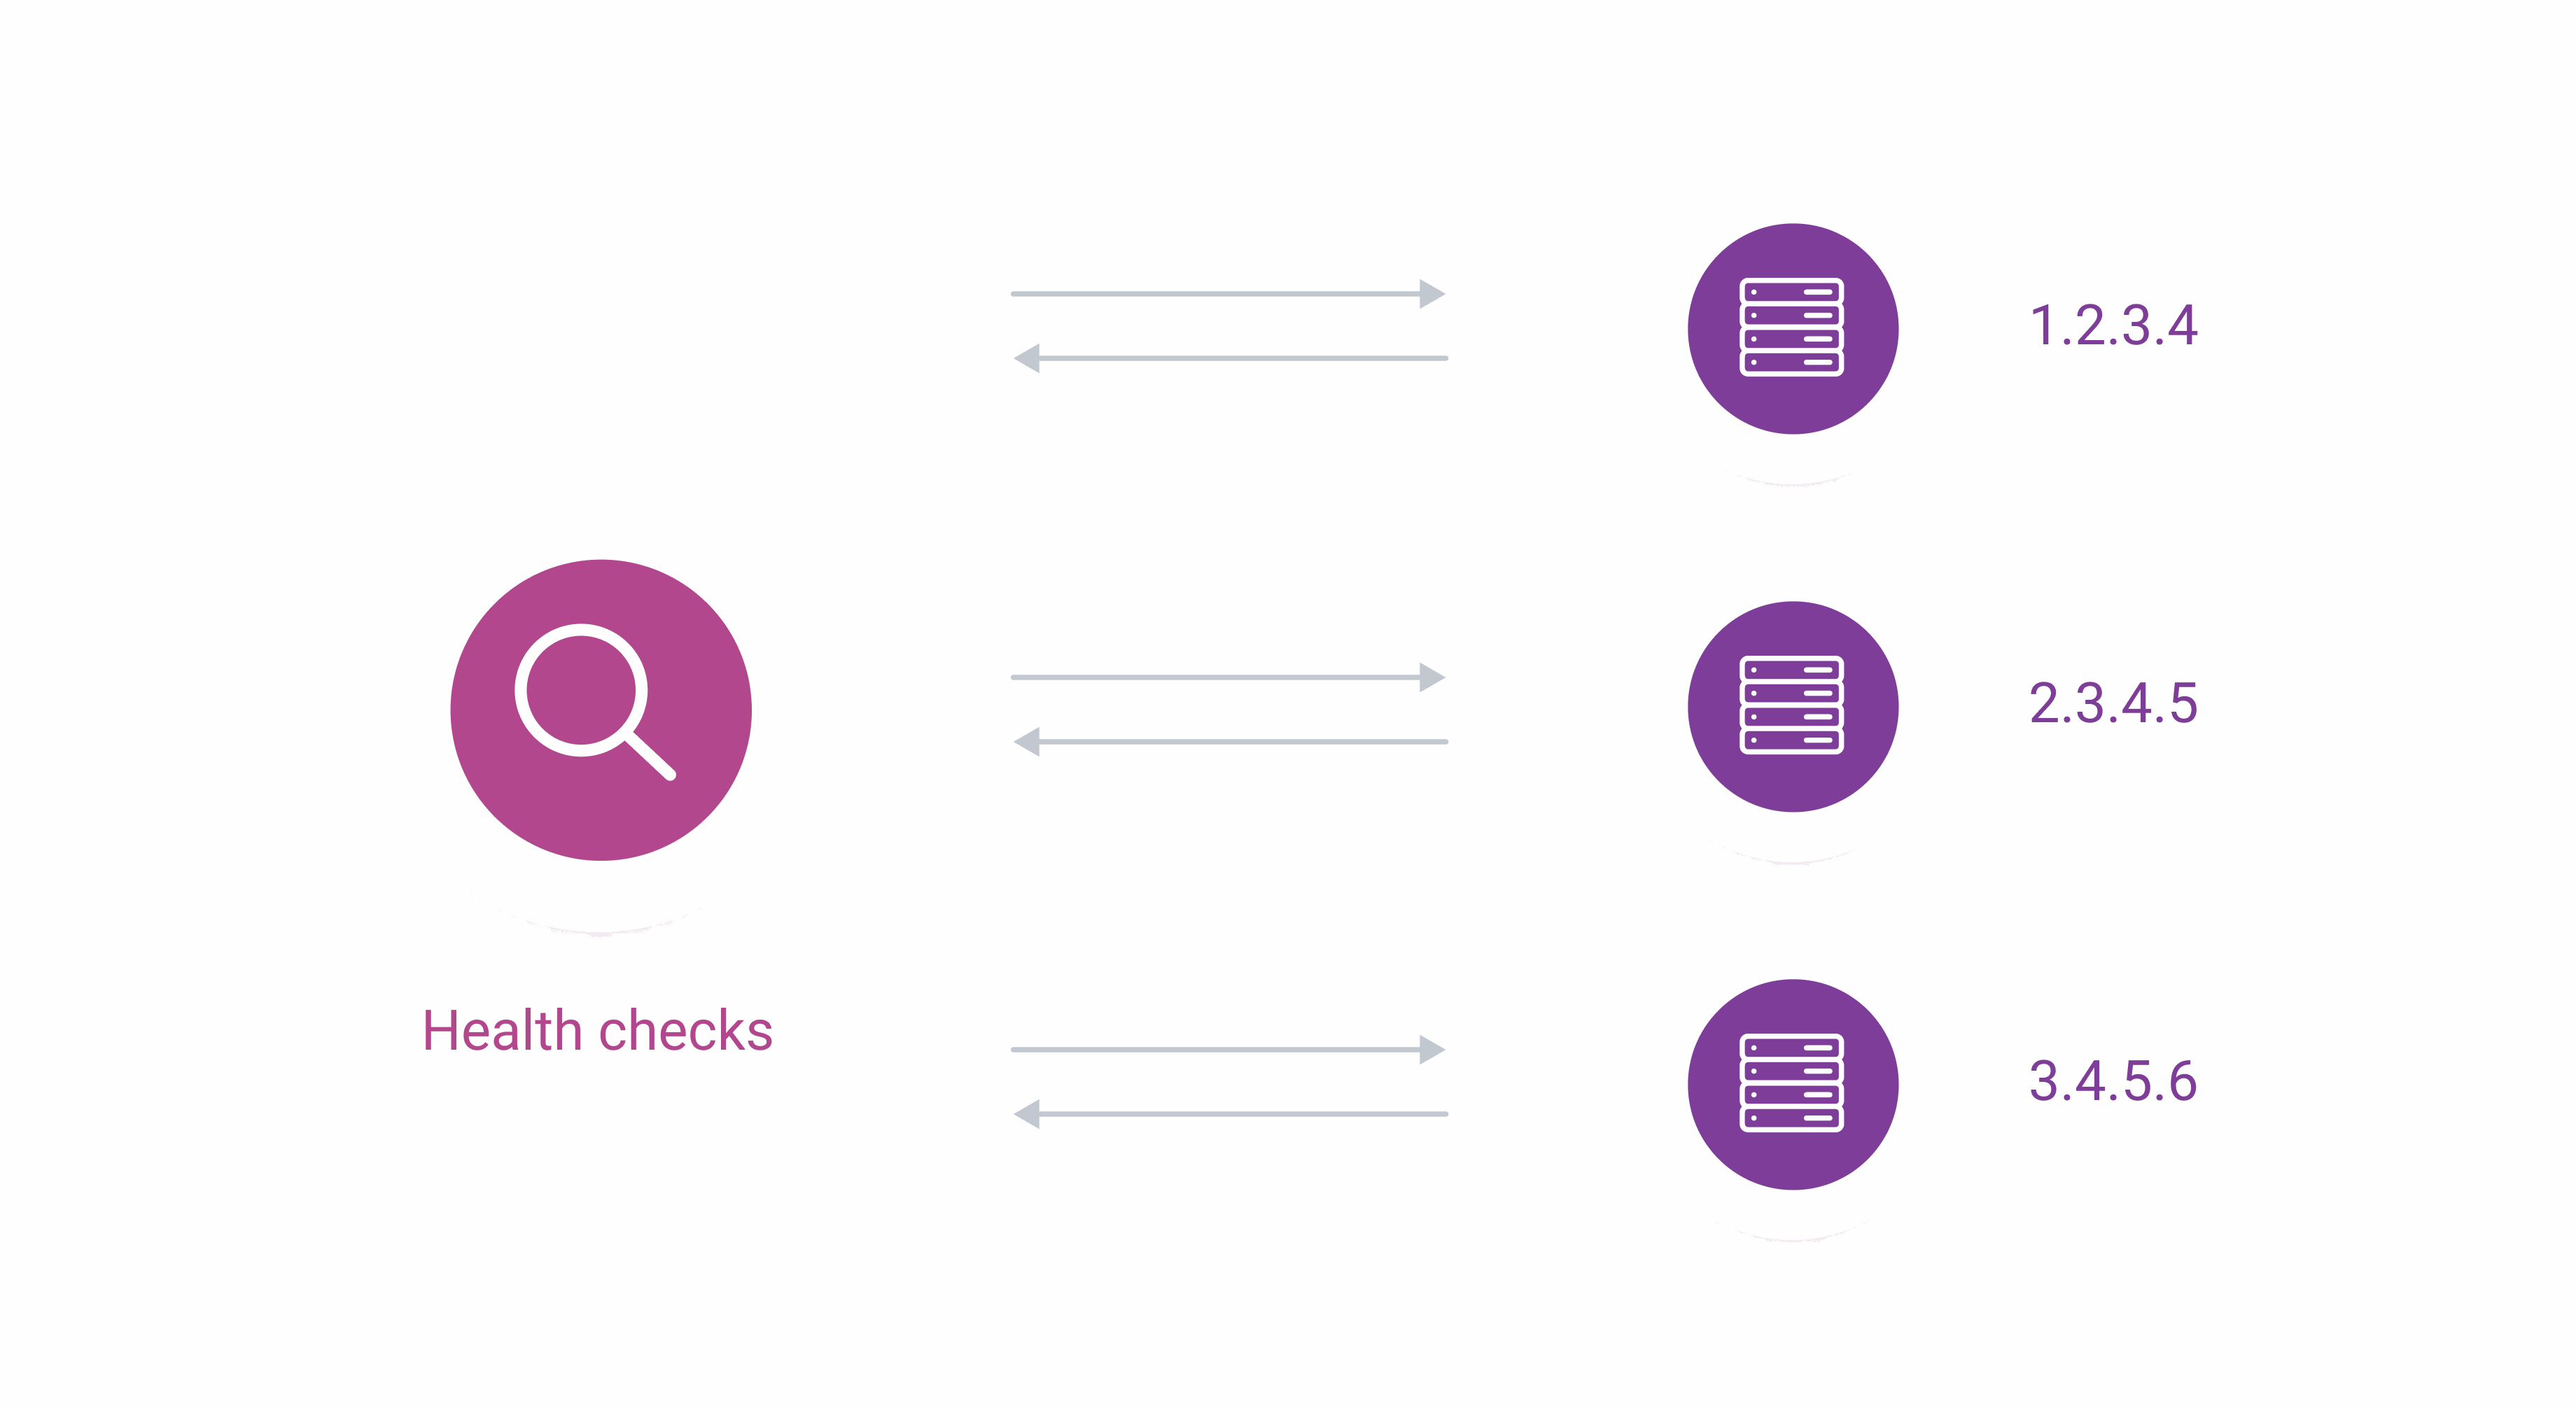
Healthchecks send requests to servers
DNS Healthchecks sends requests to servers to check their availability. Configure request settings — protocol, frequency, and others — in the CDB Technical Web Portal after the feature is enabled.
The following is an example configuration:
- Protocol: ICMP
- Frequency: 1 minute
- Timeout: 10 seconds
With this configuration, DNS Healthchecks sends requests to web servers via ICMP every 60 seconds.
- 2
Healthchecks classify servers
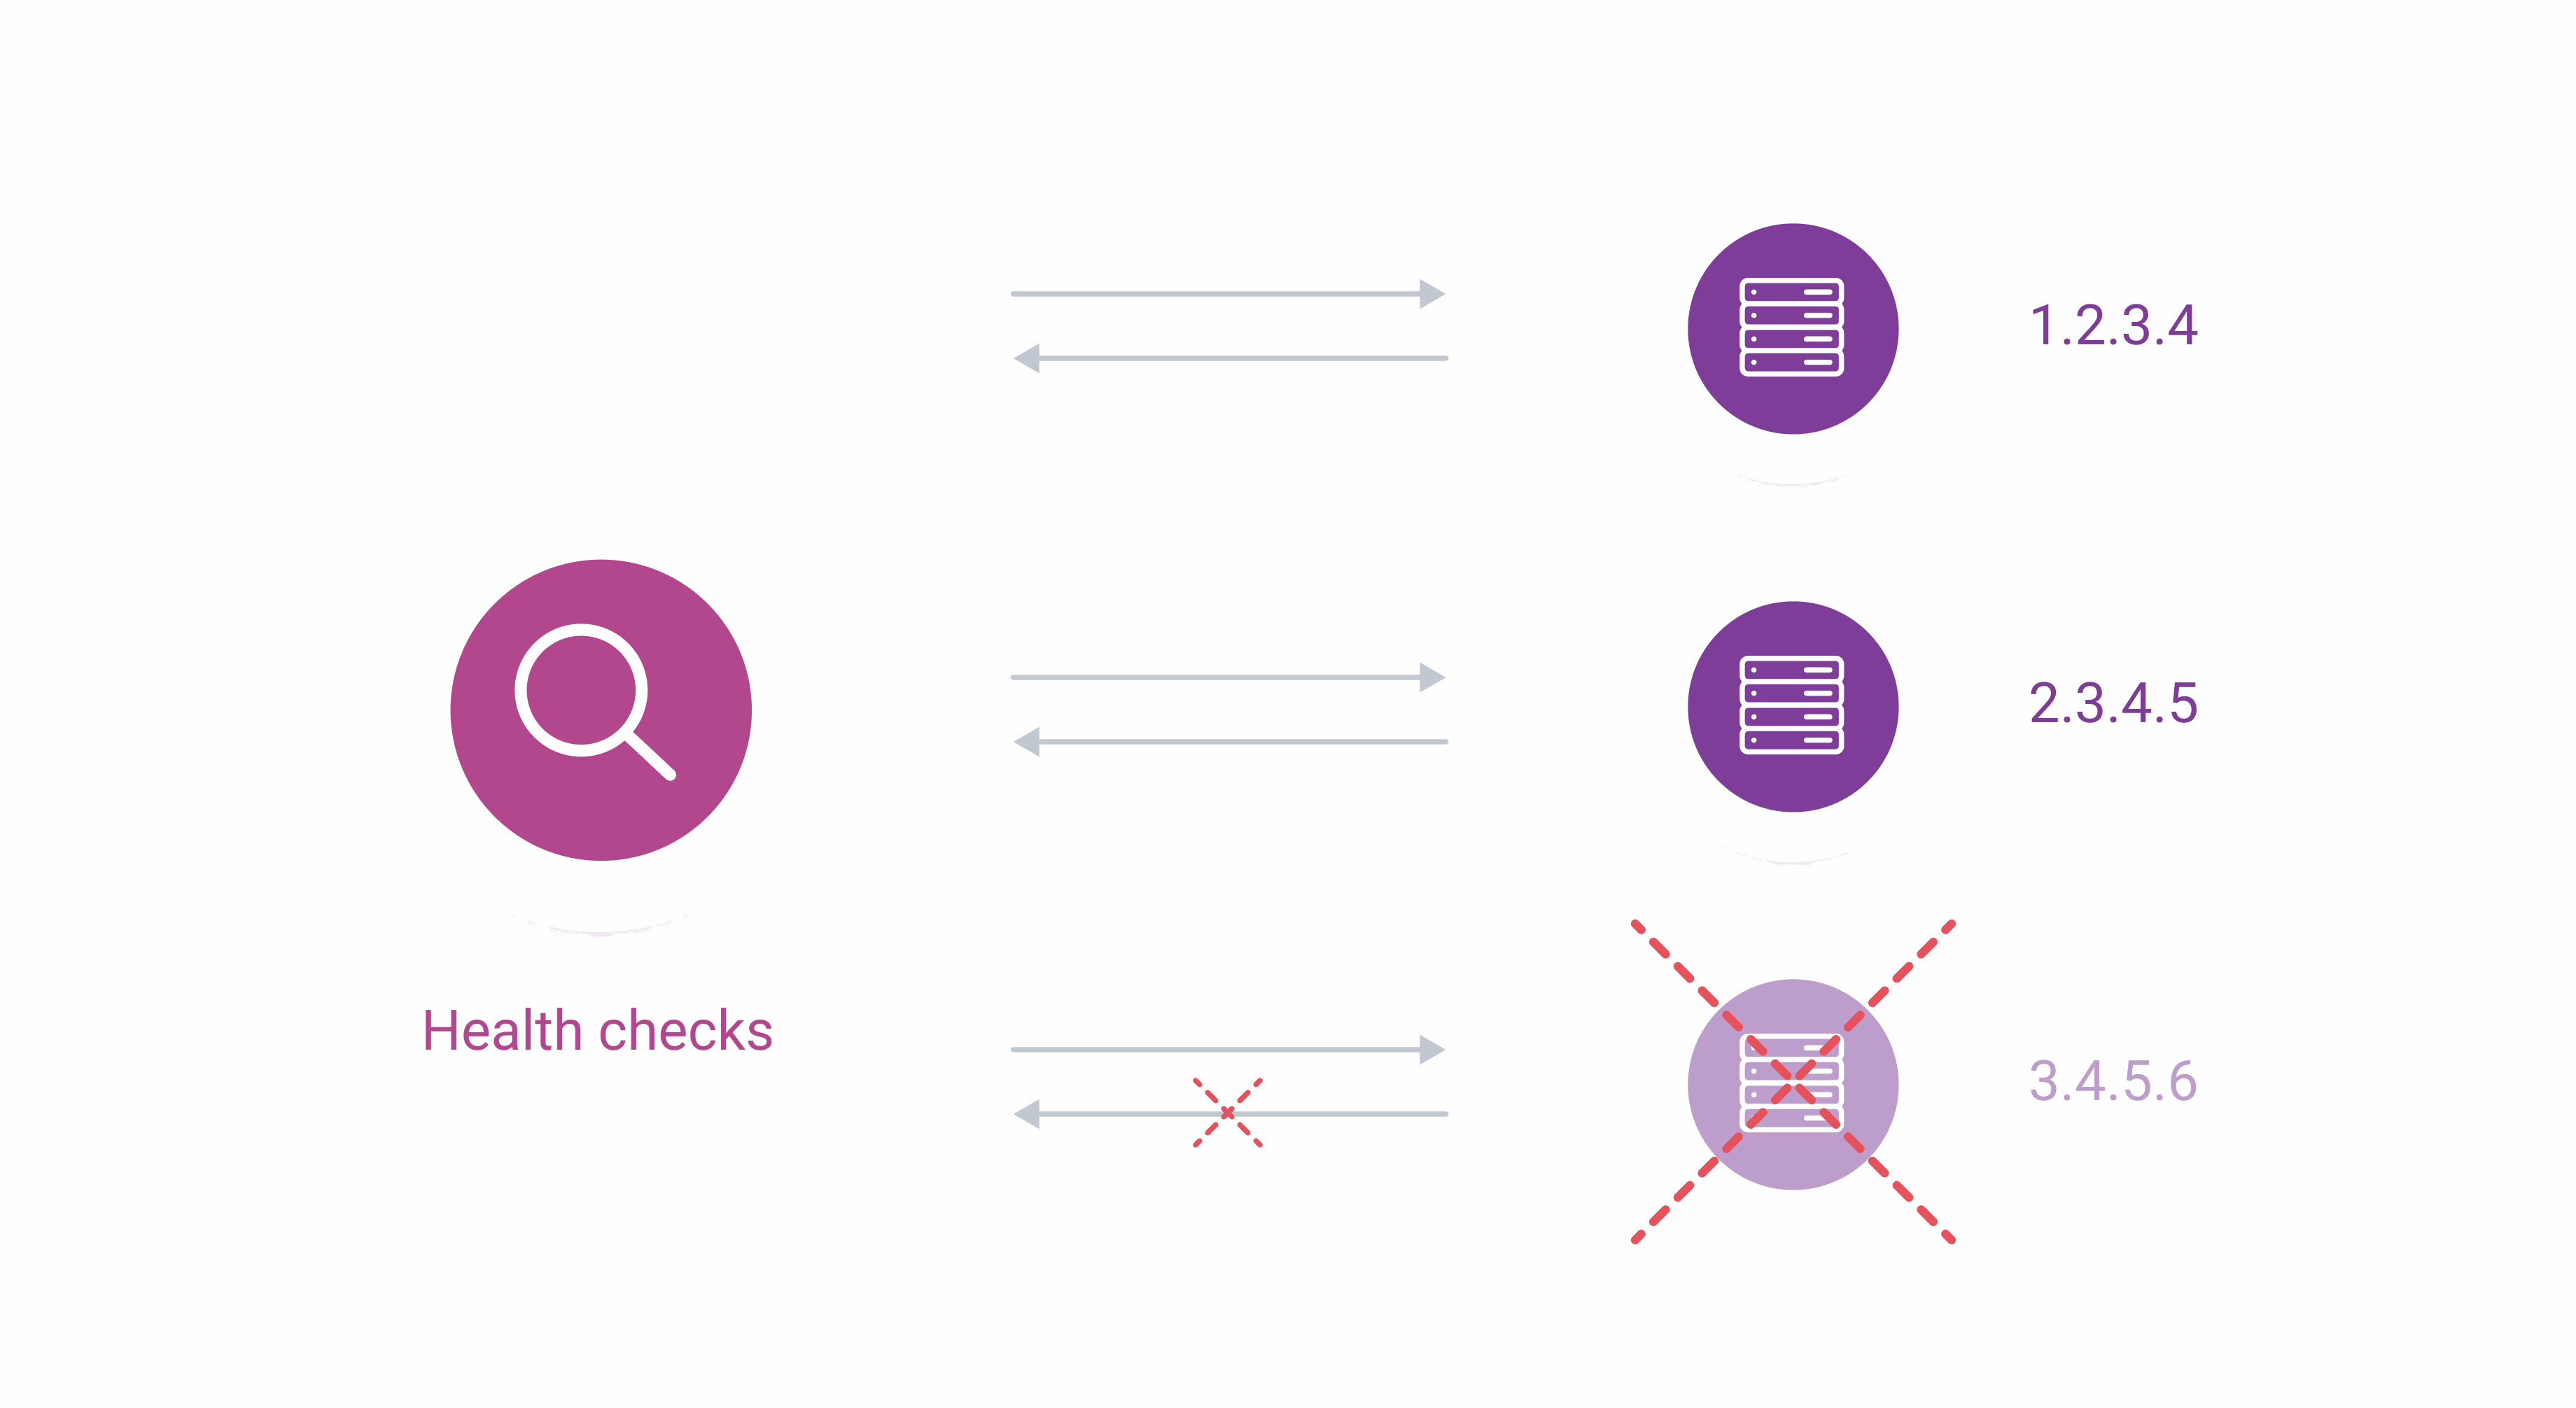
Requests are sent from all CDB DNS server locations. If web servers respond within the set timeout (e.g., 10 seconds) in 85% of locations, the feature marks them as available. If a web server fails to respond within the timeout in 20% of locations, the feature marks it as unavailable. The gap between these thresholds is intentional — a server must fall below 20% to be marked unavailable, and must recover above 85% to be marked available again, preventing flapping when availability is borderline.
- 3
Unavailable records are excluded from DNS responses
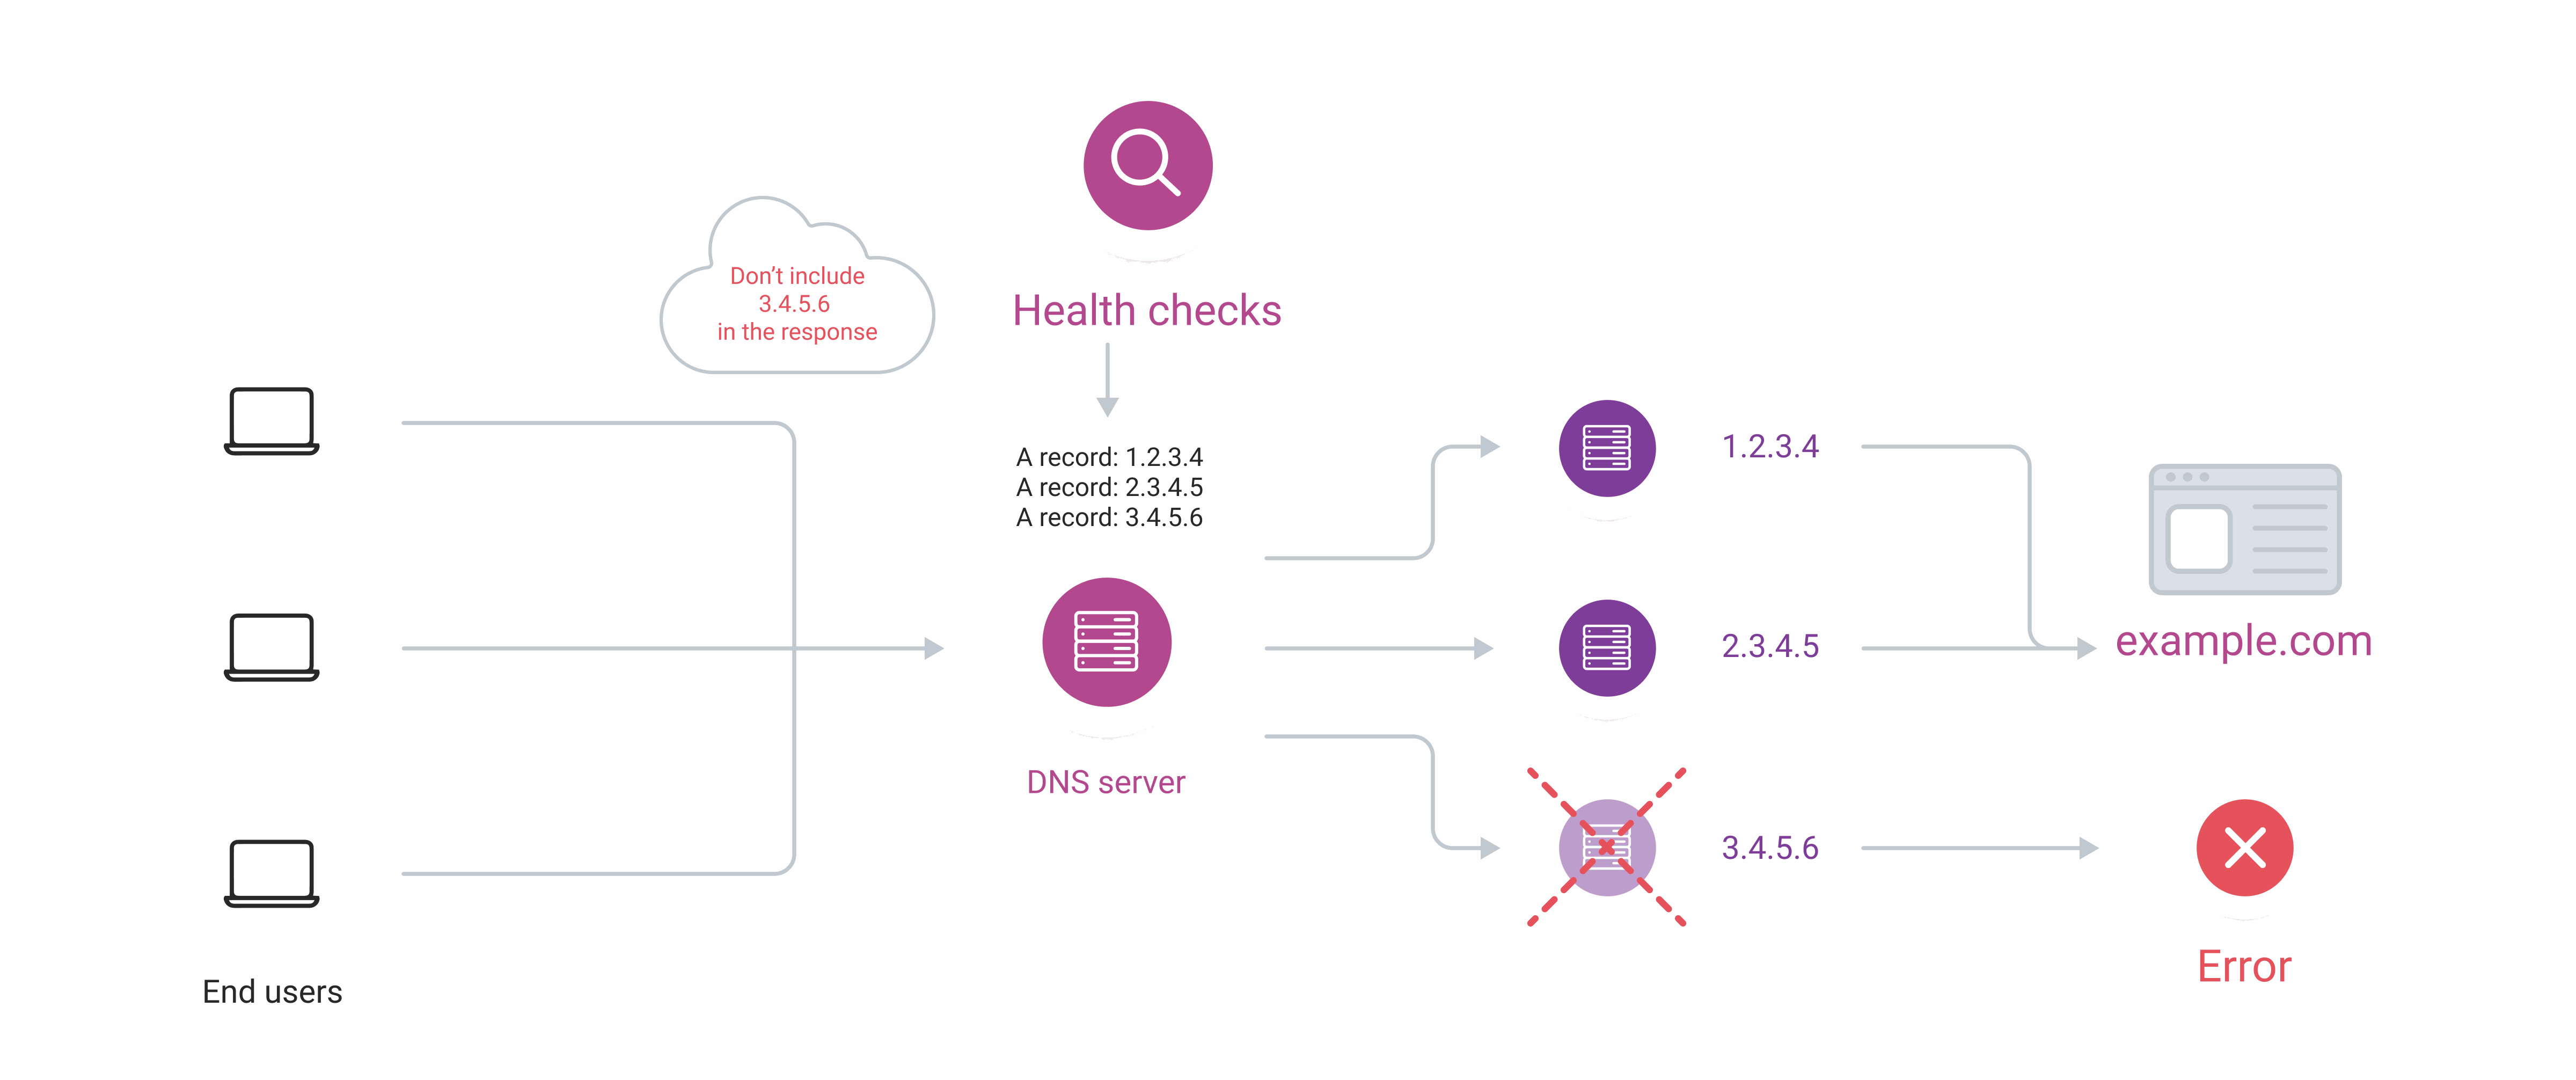
If a web server is unavailable, Healthchecks marks the corresponding record as unavailable, and the DNS server excludes it from responses.
If all Healthchecks fail, their A records will be included in the DNS response, while still adhering to other filters like geo county or first_n.
- 4
Traffic is redirected to available servers
The DNS server removes the A record of the unavailable server from its responses. Any requests intended for the unavailable server are redirected to other available servers.
The load balancing mechanism decides which server responds. By default, DNS Healthchecks use round-robin, but a custom mechanism can be configured. Dynamic response covers the available load balancing options.
- 5
Recovered servers are restored to DNS responses
Healthchecks keep sending requests to web servers. When the web server becomes available and responds, the feature sends the appropriate update to the DNS server, and the web server goes back online for end-users.
Configure healthchecks
- 1
Open the DNS section
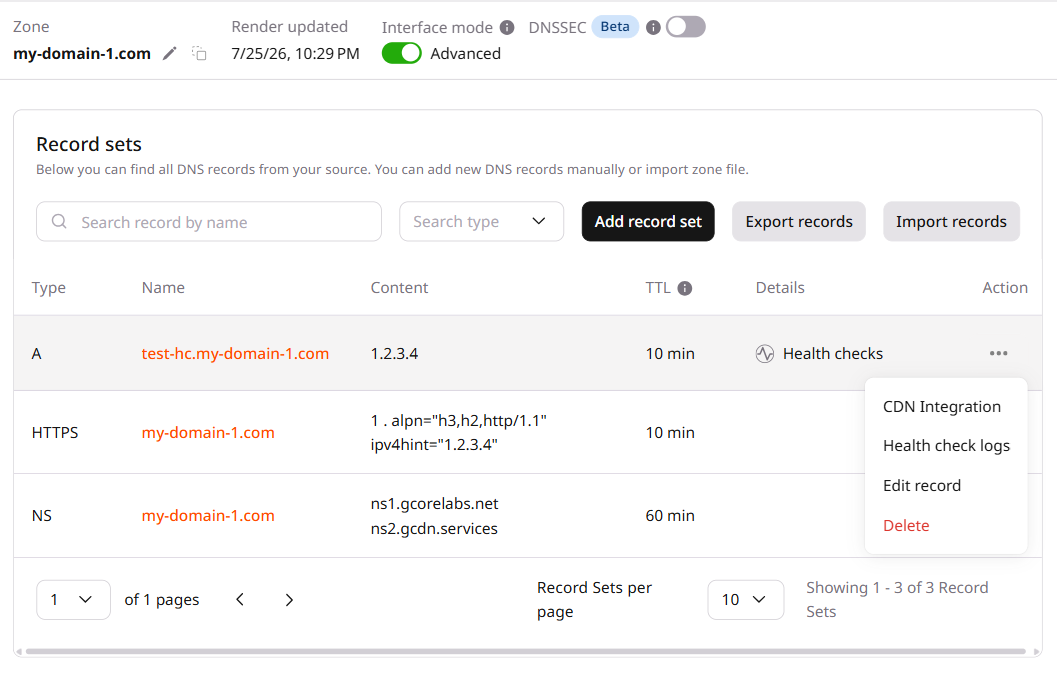
In the CDB Technical Web Portal, navigate to DNS.
- 2
Open the DNS zone
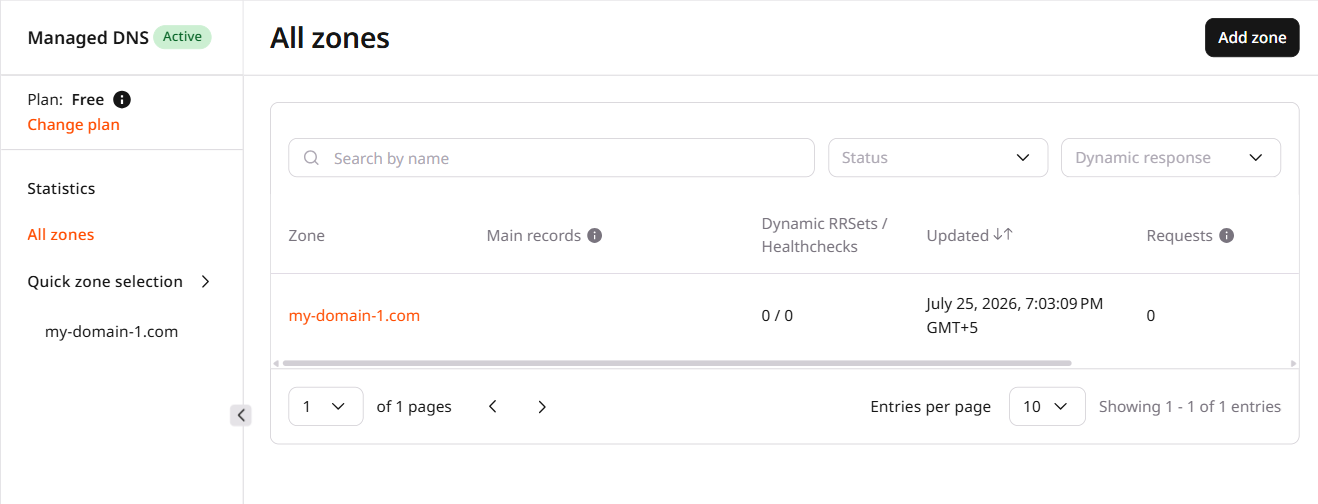
Click the domain name of the DNS zone where Healthchecks will be configured.
- 3
Confirm advanced interface mode is enabled
In non-advanced mode, the Healthchecks feature isn't available.
A Healthcheck picker can be applied only to records of the A, AAAA, or CNAME type.
- 4
Open the record for editing
Click the three-dot icon and click Edit record in the row of the A, AAAA, or CNAME record.
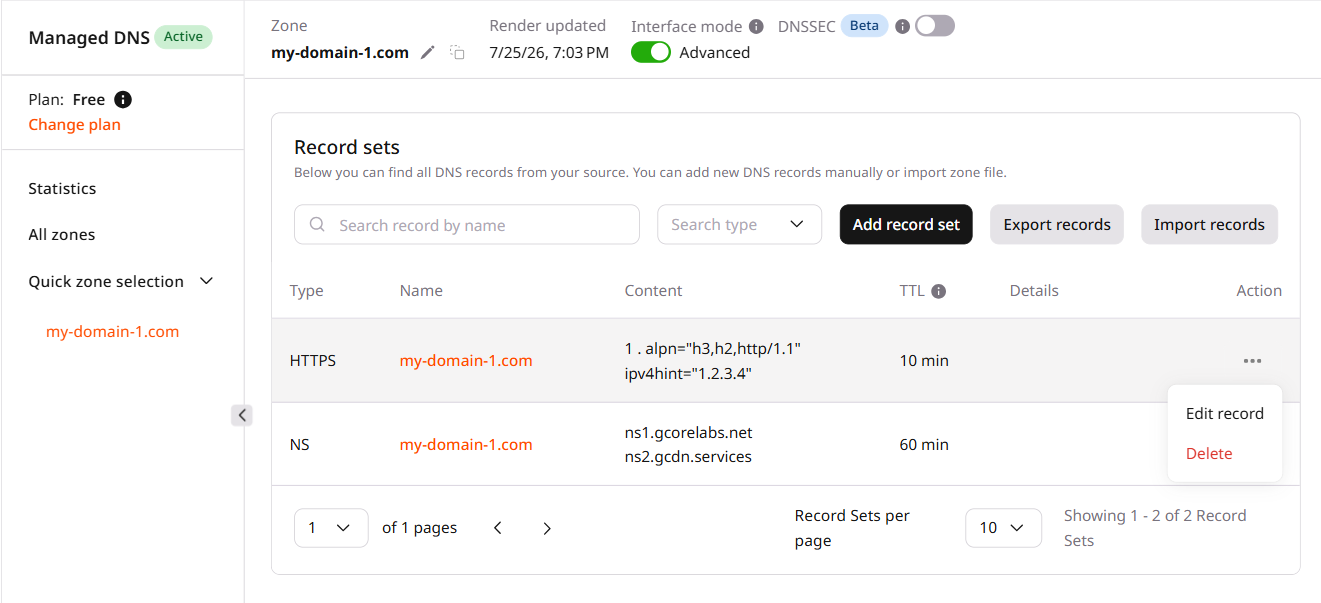
The "Records list/Edit record set" page will open. Perform the remaining steps there.
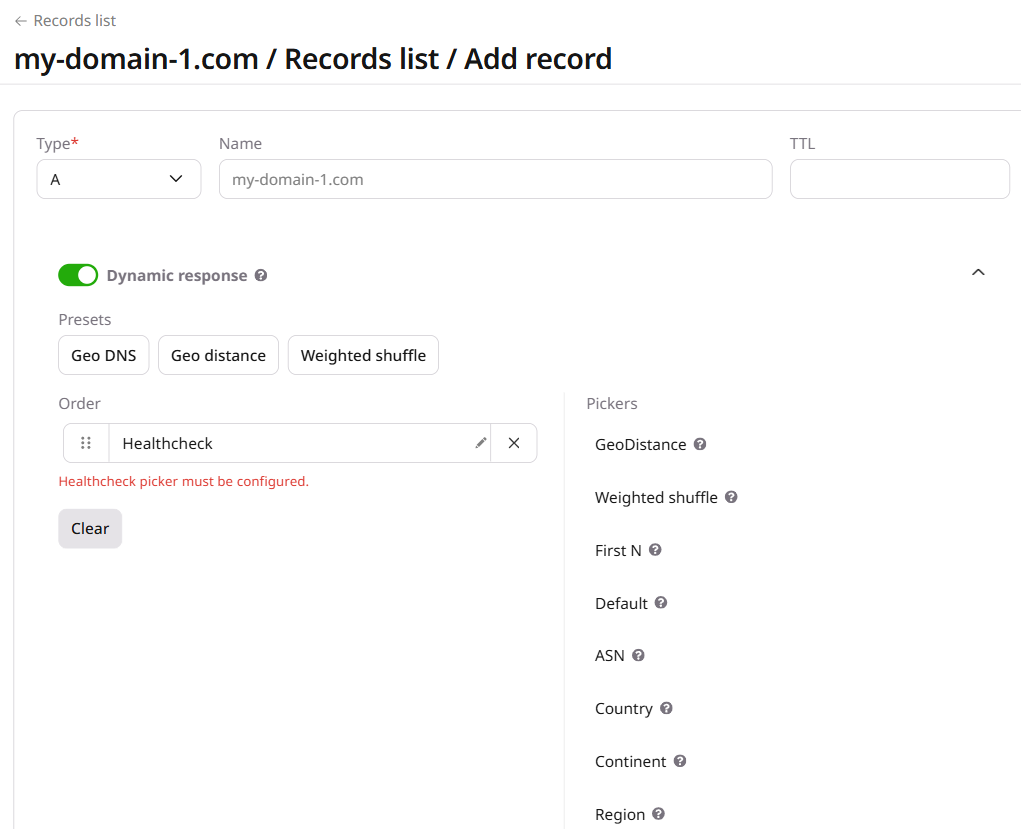
- 5
Enable Dynamic response
- 6
Add a Healthcheck picker
- 7
Open picker settings
Click the edit icon when the picker is added to the left column.
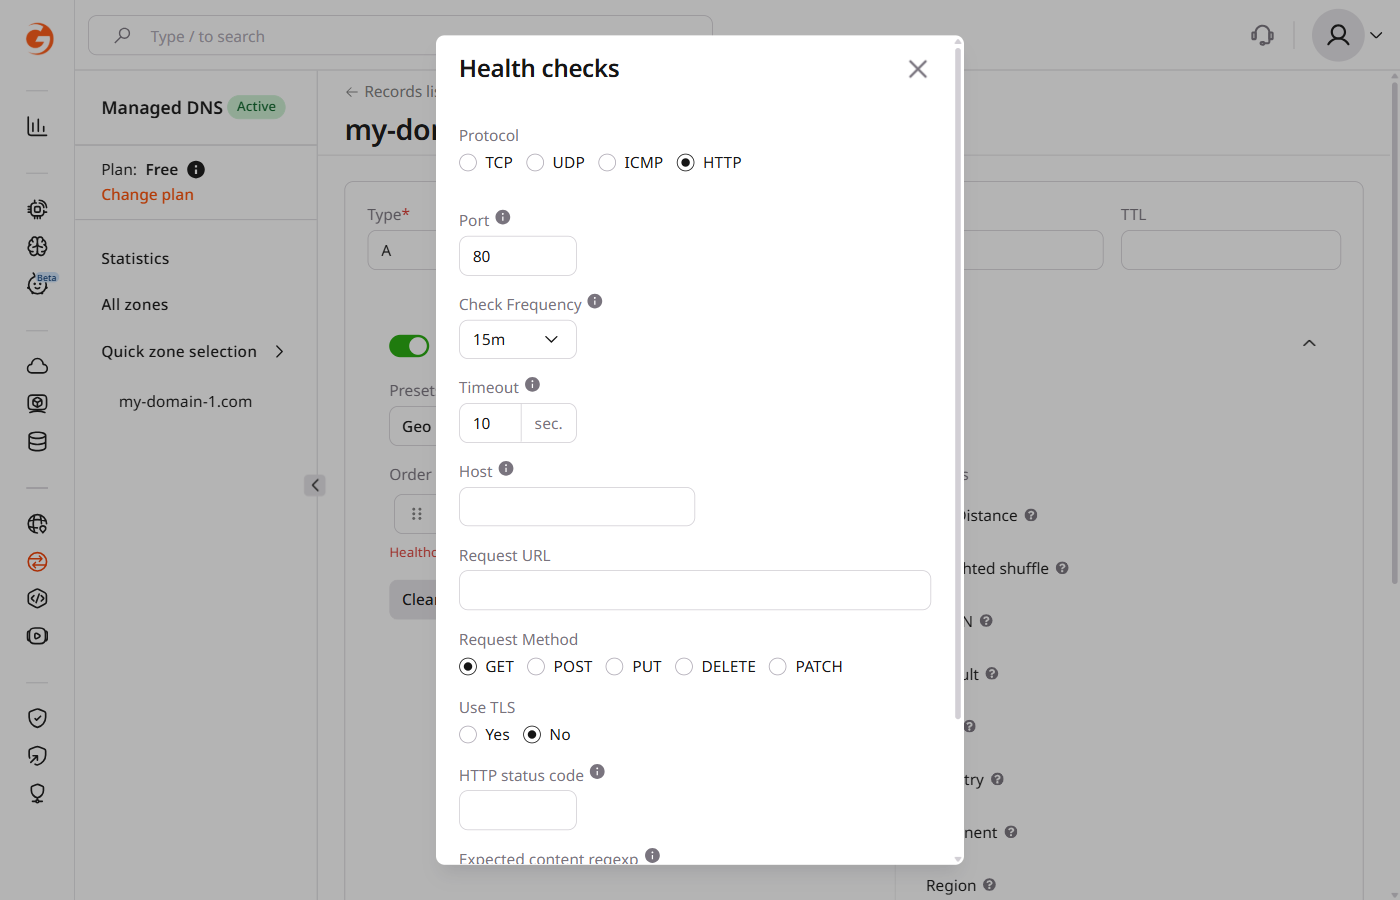
A pop-up will open. The settings differ depending on the protocol: TCP/UDP, ICMP, or HTTP. Select the relevant tab below to complete configuration.
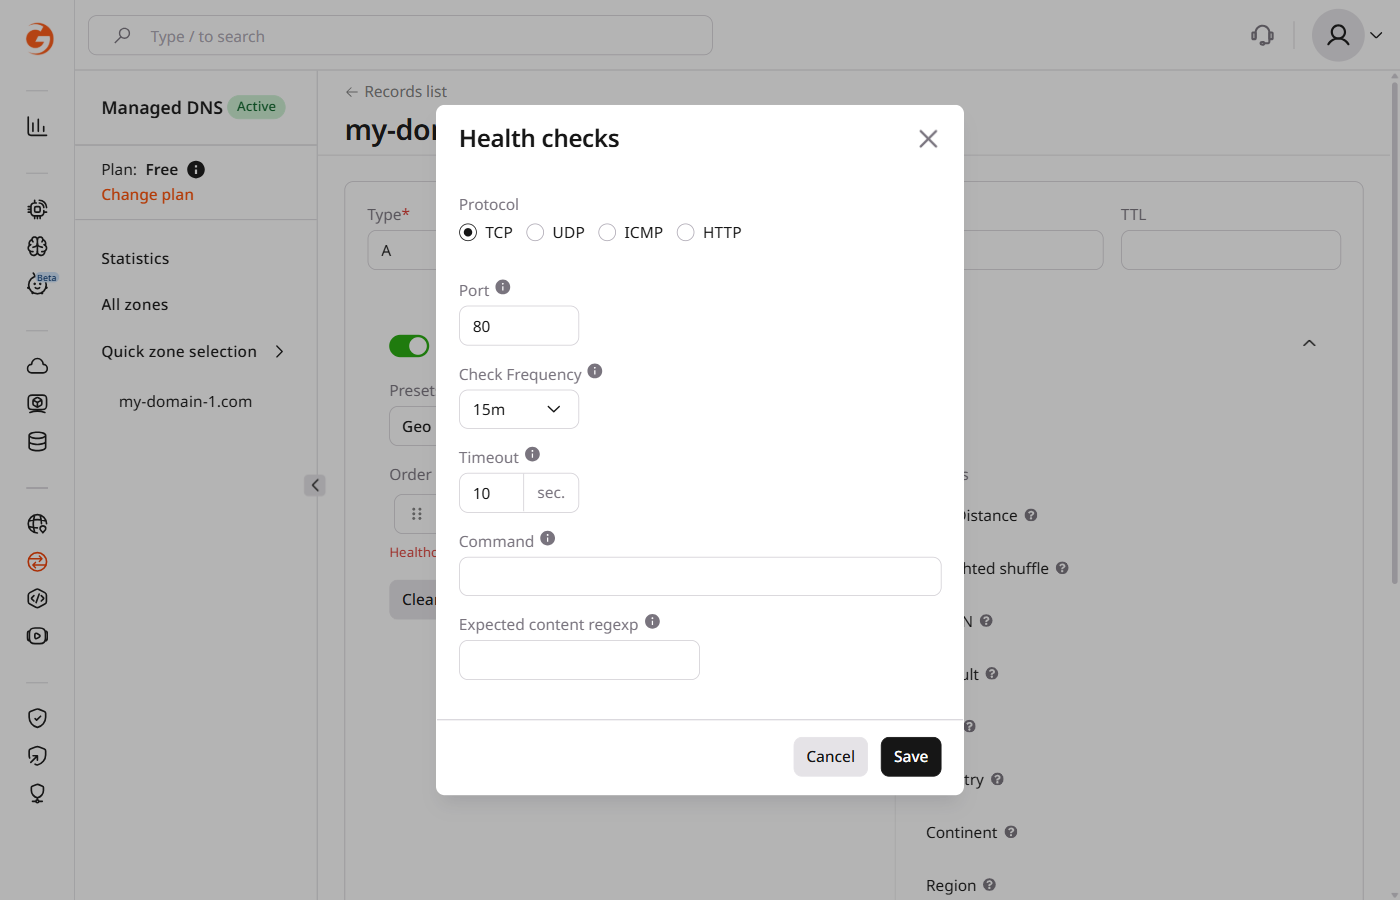
- Under "Protocol", select TCP or UDP.
- In the "Port" field, specify the connection port (e.g., 80 or 443).
- In the "Check Frequency" field, select the interval of checks from the list.
- In the "Timeout" field, set the time within which the web servers should give the response before being considered down.
- (Optional) In the "Command" field, enter the text that will be sent to the host as plain text, for instance:
GET / HTTP/1.1\n\n. - (Optional) In the "Expected content regexp" field, enter a regular expression that matches the response body or leave it blank.
- Click Save.
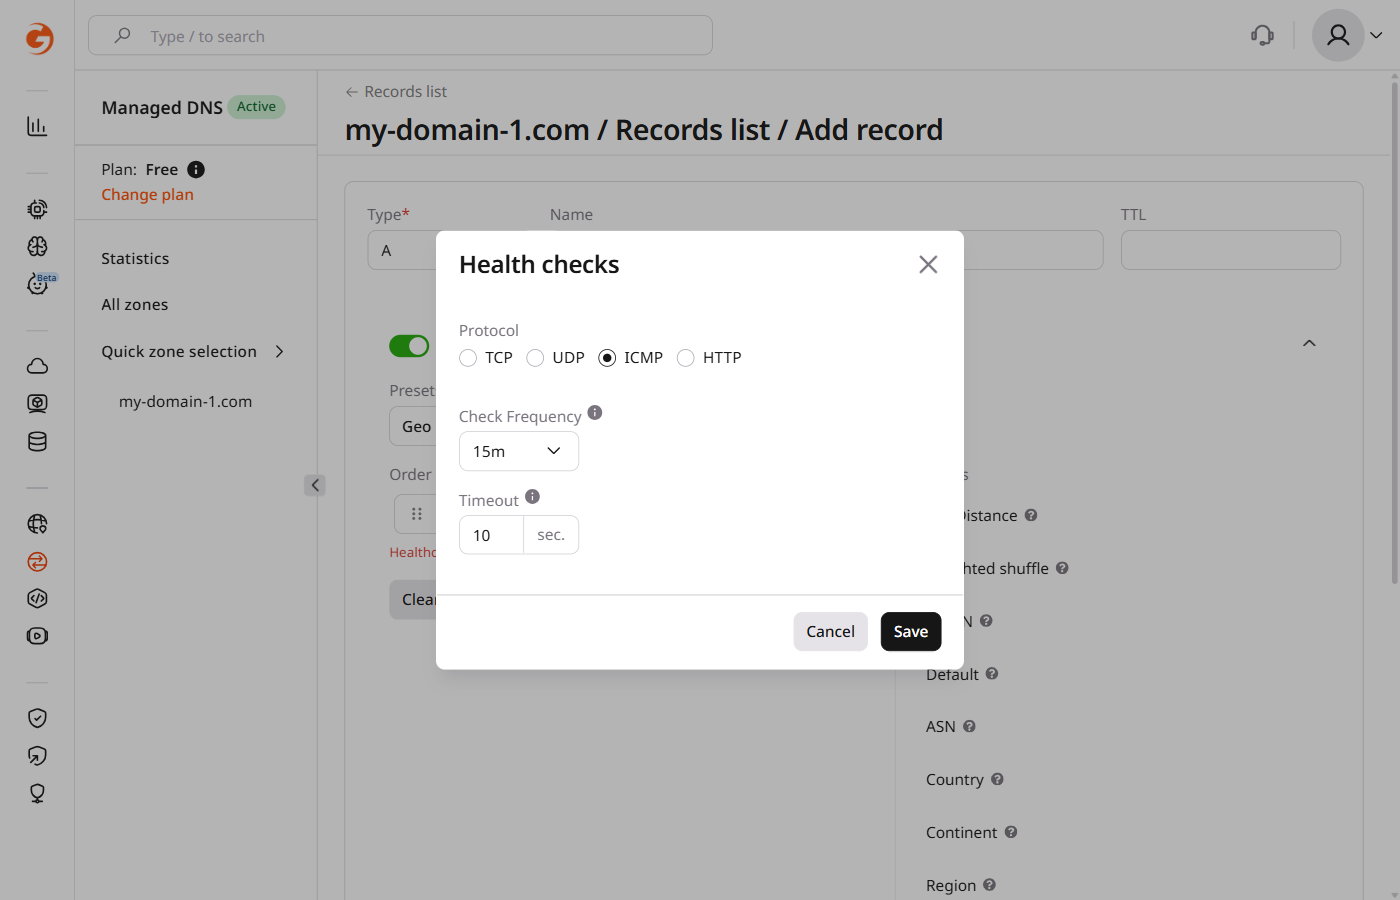
Healthchecks begin monitoring the configured address on the next check interval. If the server is unreachable, its record is excluded from DNS responses automatically and restored once it recovers. Recent monitoring events are available in the health check logs section below.
Enable backup metadata
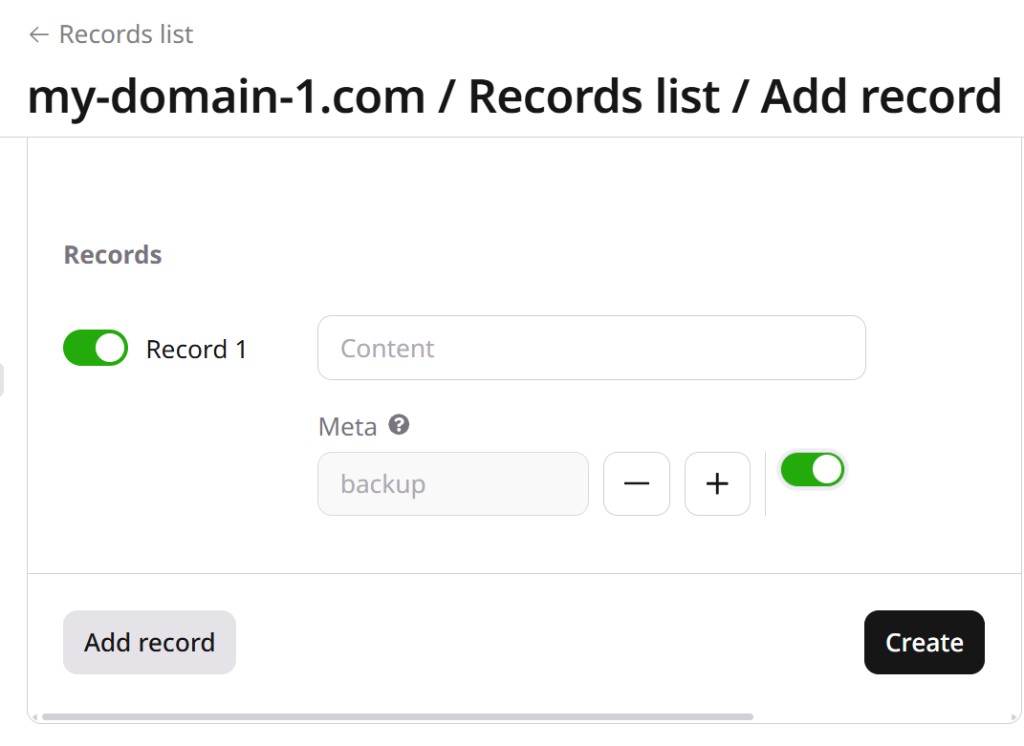
Backup metadata keeps designated records out of DNS responses as long as at least one non-backup record is healthy. When all primary records fail, backup records take over automatically.
To configure backup metadata, select which record will be used as a backup (Record one in the example), select "backup" from the dropdown list, and enable the toggle.
By default, DNS Healthchecks use round-robin balancing. Dynamic response covers the options for configuring how requests are distributed among available servers.
Check healthchecks logs
After a DNS cache renewal, Healthchecks will start monitoring availability.
To check for recent monitoring events, open the DNS zone page where Healthchecks is configured. Select the relevant record, click the three-dot icon on the right, and click Health check logs.